Sunday, 24 January 2016

Grandkids Tablet Covers

A few of my grandchildren got tablets for Christmas and I offered to make carrying cases for them. I called upon Mr. Google, and we spent some time together finding a pattern. I settled on this one from Fresh Lemons. Printed out the instructions and started to gather the supplies to work on them. The pattern didn't have a handle and I figured it would be easier for the younger ones to carry with a handle. During the Christmas break grandpa and I took them to one of my local quilt shops. I let them pick out the fabrics they wanted. I did avoid buying fabric for me, of course that's not to say the temptation wasn't there, that's for another trip later on. You all know how that works.
Fabric choices
The deer fabric is what my 8 year old grandson wanted. My 2 and 1/2 year old is into dinosaurs, I think that pattern is adorable. My 5 year old granddaughter is into pink, but she really liked the party fabric which surprised me, so we paired hers with pink. 
I decided to try Bosal In-R-Form instead of batting. I had never worked with this product before, it is not as giving as batting but gave the covers a nice shape and I think more protection for the tablets.

Bosal stabilizer

I made my handles for the covers the same as I do when making bags. I started with a 4 inch by 16 inch strip of fabric and a 2 inch strip of fusible interfacing.


handle strips

Press the fabric strip in half wrong sides together. Center the fusible strip in the middle of the fabric strip and fuse in place.

fused strip

Press each long side of the strip to the center. Then press in half encasing the raw edges.
pressing sides to center of strip

Top stitch the edge of the handle and down the middle. I placed the handle 3/4 of an inch in from the side of the cover back. Baste in place. Hard to see the handle as it blends right in with the fabric for the back.

3/4 of an inch from the side edge of the cover back

Continue making the cover as per the directions. 

Finished cover

When I made the cover for my youngest grandson. I sewed the opening across the widest side, as his is a leap pad and I thought it would be easier for him to get it in and out. 

three covers ready to go.

All three covers fit their tablets perfectly. The zipper front pocket holds the chargers. I am making one more for another granddaughter. 

I love making things for my grandchildren. Do you have someone special to sew for?


Sunday, 17 January 2016

Charity Quilt Top

Another charity top finished up for my guild to give to our chosen charity this year. You can read about my first top here. I had these leftovers from the first top and wasn't at all sure how I was going to use them.

leftovers

The strips were different lengths and widths. I threw around the idea of some sort of log cabin version. But wasn't really happy with how that was going to look. In the end I decided to just start sewing three or four strips together, aiming for at least a 6 inch wide strip set. I didn't think to take any pictures of the process sorry. I then cut them into 6 inch blocks, I also cut a 6 inch square of background fabric square to make HST's.

6 inch block strip set


HST's 


My daughter played with a layout, we decided ( after much debate) to leave it offset. A two and a half inch border of yellow followed by a three and a half inch piano key border using up the rest of leftovers. 
I think the yellow borders helped pull everything together. 

finished top
It finished up at 50 inches x 59 inches.


It has been a bit since I last posted, and a lot can happen in a short time. Please give your loved ones a hug as we don't know what the next day can bring.


Be sure to check out Craftsy sale this weekend only, Craftsy is doing something they almost never do — all new online classes are up to 50% off. That's right! That just-released class you've been eyeing from your favorite instructor? It's on sale at prices so rare, you definitely don't want to miss out. These deals will be gone soon, so shop now!  Link is here, this is an affiliate link.

Sunday, 3 January 2016

Double Cross Block Pattern

 I say good riddance to 2015 and hello 2016. 2015 was a difficult year, both my DIL's and myself had or are continuing to deal with health issues. My oldest son's wife lost her baby in July, the same month I started dealing with my own health problems, and my youngest son's wife has Transverse Myletis, she found out days before Christmas.

I'm not going to look back but ahead. So to say hello to a New Year, I have a new free block pattern for you. I designed the block way back in June. I was going to use the block in my guilds BOM but used a different block instead. Double Cross was tested by Joanne of Canuck Quilter. If you make the pattern I would love to see your results.

Double Cross Block

Double Cross Block Pattern

This is a 12 1/2'' unfinished or 12'' finished block.

All seams are 1/4''.


Cutting:

Dark fabric:     C cut (1) 9 1/2'' x 1 1/2''
                      G cut (2) 5'' x 1 1/2''

Medium Fabric:   A cut (1) 7 1/4'' x 7 1/4''
                         B cut (1) 1 1/2'' x 1 1/2''

Background Fabric:   D cut (4) 3 7/8'' x 3 7/8''
                               E cut (4) 3 1/2'' x 3 1/2''
                               F cut (1) 6 1/2'' x 6 1/2'' square cut in half diagonally to make 2 triangles F


Step 1:

1. On the back of all D pieces draw a diagonal line from corner to corner.
2. Place two squares on top of piece A matching opposite corners and right sides together. Sew a 1/4'' seam on both sides of the line. As per diagram 1a.
3. Cut diagonally on the drawn line as per diagram 1b.

diagram 1

4. Place a piece D on one of the units from 3 above as per diagram 2a.
5. This will yield two flying geese. Sew a 1/4" seam on both sides of the line and cut along the drawn line as per diagram 2b.
6. Repeat for other unit.
7. This makes four flying geese.

diagram 2

Step 2:

1. Stitch B to the long end of G. Repeat with the other G piece. As per diagram  3 To make a GBG strip.

diagram 3

Step 3:

1. Fold each triangle F in half, matching points, finger pressing to mark the center of its long side.
2. Fold C in half, finger pressing to mark the center of its long side..
4. With right sides together and matching centers, stitch triangle F to each long side of C. As per diagram 4a and 4b.
5. Stitch other the half of F to the above unit.6. Cut this unit in half diagonally. As per diagam 4c.
7. Stitch one half of the this unit to the GBG strip. As per diagram 4d.
8. Repeat with other diagonal half.
9. Trim to 6 1/2'' x 6 1/2'' by cutting 3 1/4" from the center of B on each side to make sure the cross is centered.

diagram 4

Step 4:

1. Join rows together as per diagram 5.
2. Press in the direction of arrows. Pressing towards E in rows 1 and 3 will allow for the nesting of seams. Which will result in your block laying flatter.

diagram 5

A sample layout of the block shows the secondary pattern. How fun is that?

layout 


A PDF version is available at Craftsy.


Wednesday, 23 December 2015

Happy Holidays

Two sleeps and the big day will be here. A lot of work and time spent for one day. But when surrounded by those we love it is so worth it.
For those who celebrate this Christmas season as I do, Merry Christmas. For those who celebrate this holiday season in another way, Season's Greetings - Happy Holidays. I wish peace, love,  joy and good health to all.

Merry Christmas!

Tuesday, 15 December 2015

Medallion BOM Finished

This was slow going but at last I have a finish in plenty of time to give as a Christmas gift for my oldest son. You can read about this quilt here.  We have no sun which makes it hard to get good pictures. No snow either!


No snow yet! But also no sun.
The first border I added was simply HST's with a strip of background fabric added to each end to make the border fit. Then a strip of background fabric and a final strip of the same fabric as the sashing and inner border. It finished up at 70'' but after tossing it in the washer and dryer it finishes at 67 1/2''s square. I love a quilt fresh out of the dryer showing all the texture of the quilting. 

I did try out some ruler work with the ruler foot toe, you can read more about the foot here. Amy from Amy's Free Motion Quilting Adventures has a Craftsy class which I have already taken,this is an affiliate link. I only have one ruler but I know I will be buying more soon. 
It did take a bit to get used to moving the ruler with the fabric and I have, as my one granddaughter said a couple 'hills' where the I didn't move everything together as a unit. But overall I was impressed hills and all. As you can tell it doesn't take much to get me excited.

ruler work complete with 'hills'

harder to see the ruler work in this one mainly the background.

On top of that I have hardly any scraps from this project I made a scrappy binding, by sewing 1 1/2'' strips of all the red fabrics, together then cutting them at a 45 degree angle at 2 1/4'' for my binding width, then I sewed the cut strips together to make over 320'' of binding. I like the effect of the scrappy binding.

scrappy binding

By the way I fixed the block with the corners going the wrong way read about that here. I appliqued a  new piece over each corner and quilted them.  

all fixed

The colours in the quilt would have shown up better if Mr. Sun would have made an appearance.

hanging in a tree


I was going to make a table runner and a couple other things I had in mind for Christmas, maybe next year. I don't have a single thing wrapped and Christmas is next week....

Are you ready for Christmas?


Saturday, 12 December 2015

How could I?

Did you ever have this happen? Apparently I need stronger glasses. I just can't believe I did this but the picture doesn't lie and it gets worse I quilted it and still didn't notice it.

big oops
Oh and of course the sashings are already quilted too. Now what? Do I rip it all out? I am already dreading even the thoughts of that idea. Do I leave it as is? The Amish are said to have a mistake somewhere in their quilts. Maybe I can pretend I'm Amish...  What would you do? Just in case you didn't catch it. See those HST's to the right they are turned in instead of out.


Sunday, 6 December 2015

Sunday Stash Here I go again

I did it again...More Fat Quarters! I'm a sucker for them. I don't see any help in the near future of this problem getting any better. I bought these three bundles, I never buy bundles but I couldn't resist the temptation of these three, from Craftsy.  Craftsy is having 12 days of Christmas sale now. This is an affiliate link, I get a small compensation if you click on it. We have no snow! It is a little overcast, that is supposed to clear and the sun is going to make an appearance. Everyday that is a no shovel day is fantastic in my books. I know a Canadian who doesn't want snow, what can I say but pleaseee everyone else keep the white stuff to yourself. No sharing allowed!

Three bundles of quilty bliss

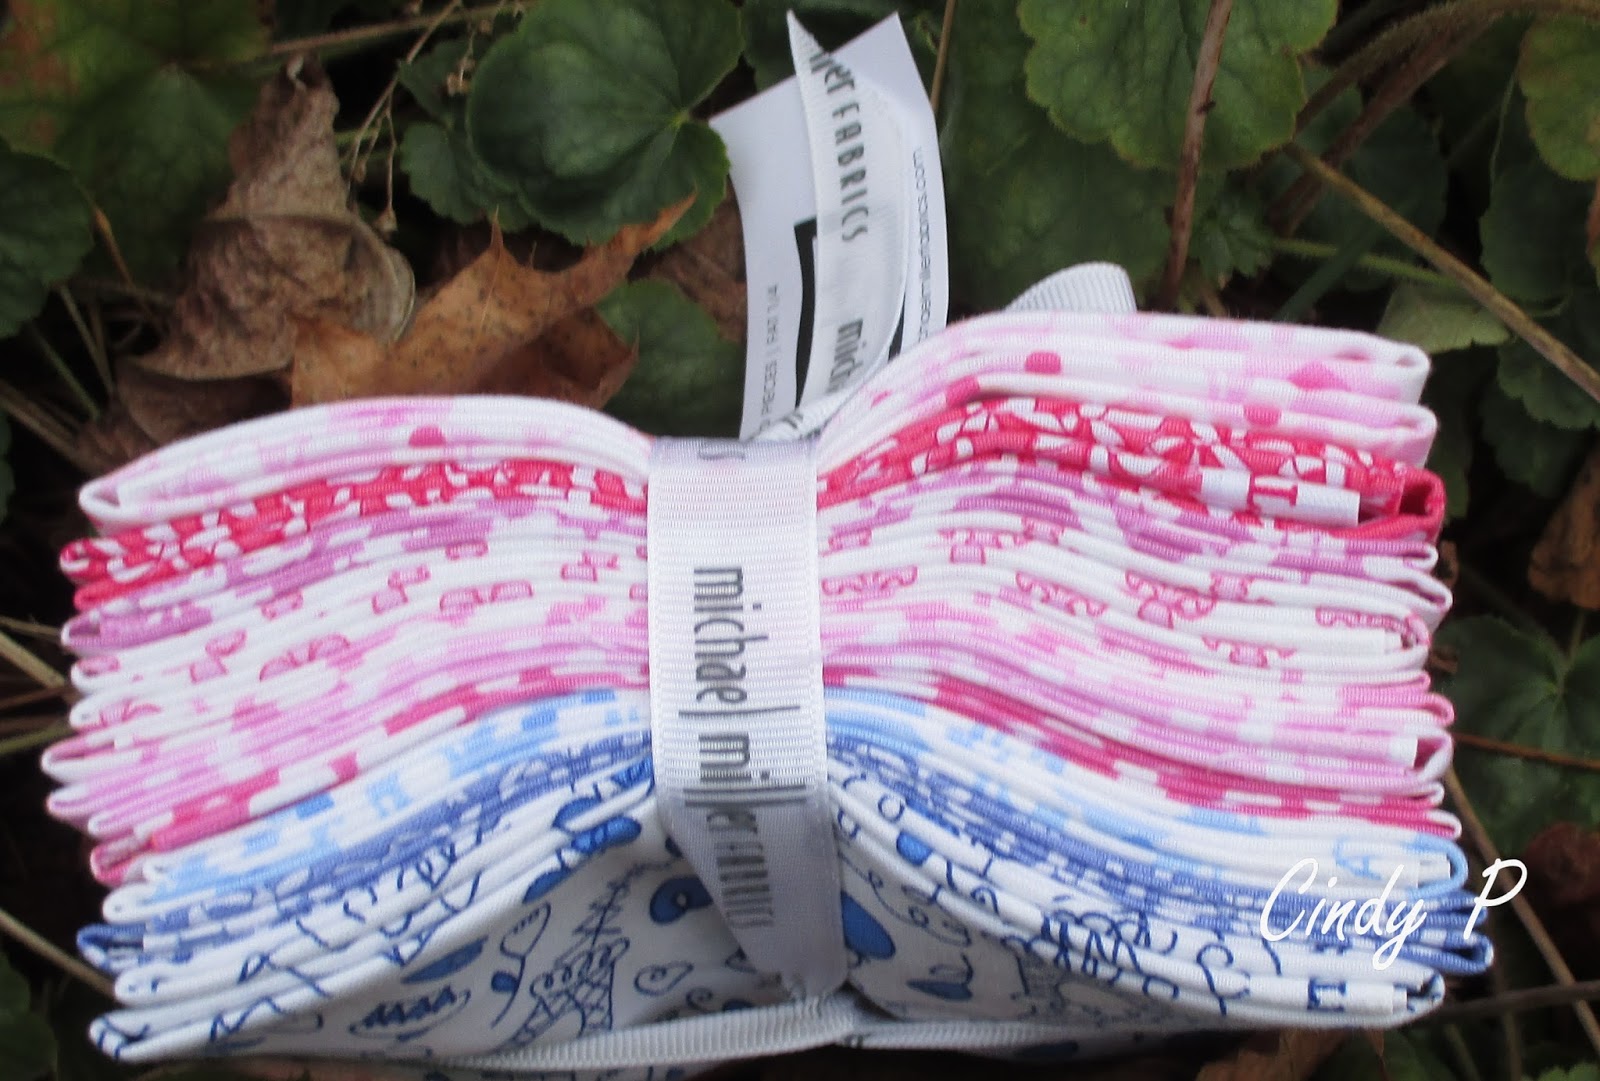
I haven't even opened these bundles yet. That will come later. First up this bundle of Michael Miller 10 piece Pastel Provence. One of my granddaughters is starting to collect all things Eiffel Tower. The bottom piece has Eiffel towers  on it. I am thinking of making a wall hanging for her using this bundle, for her birthday in March. At least I have a plan to use theses ones.

Pastel Provence bundle

Up next is Windham Fabrics Christmas Bundle. I am in short supply of Christmas fabrics and hopefully these are destined to become a table runner and pot holders. Maybe for next year as I don't see myself having time to get them done this year. But one never knows miracles do happen....

Christmas bundle 12 pieces

Last but not least is this 15 piece bundle of Traditional Windham Fabrics. No plan no ideas just a weak moment again. Who knows maybe an idea will appear. Maybe a BOM? 

Lovely bundle but sadly no idea on how to use them
I need to get to work on the quilting of my oldest son's Christmas gift you can read about it here. I bought a ruler toe foot and ruler for my DSM. I did some practicing on a quilt sandwich practice piece. I'm ready...kind of ....maybe to use it on my son's quilt. I'll have more about that in another post. In the meantime a sneak preview...at least it's all set up to start.