Showing posts with label Mini Round Robin. Show all posts

Sunday, 23 October 2016

Mini Round Robin Finish - 'Oops and Friends'

one round robin mini patiently waiting for quilting


You can read about how 'Oops' came to be here, Sandra of mmmquilts first round here, Tish of Tish's Adventures in Wonderland round here and last but not least Julie of Pink Doxies round here.

Once I sandwiched my Mini Round Robin quilt, it was full steam ahead. With no clear plan I put it under my domestic machine's foot and just started it felt so right, isn't that the way with friends. It seemed to flow as I went.

ahh a finish

In the center I echoed the star then did some meander stitching in the grey to make the star pop a little. I maybe should have used a smaller meander to make it pop more. In the seminole blocks of both Sandra's and Julie's round I again did some echoing. I also echoed the star points that Tish did extending the star into the black corners that Sandra added. I love feathers, and quilted them in the black rectangles that Tish added in her round. To finish it up I did some paisley's in the darker purple outer rectangles of Julie's round.

hanging out in the garden


The back shows the quilting much better than anything I can describe.

the back is an Andover grey print
I used two colours of Aurifil thread, black and dove for the quilting. Dove is one of my favourite colours of Aurifil thread.
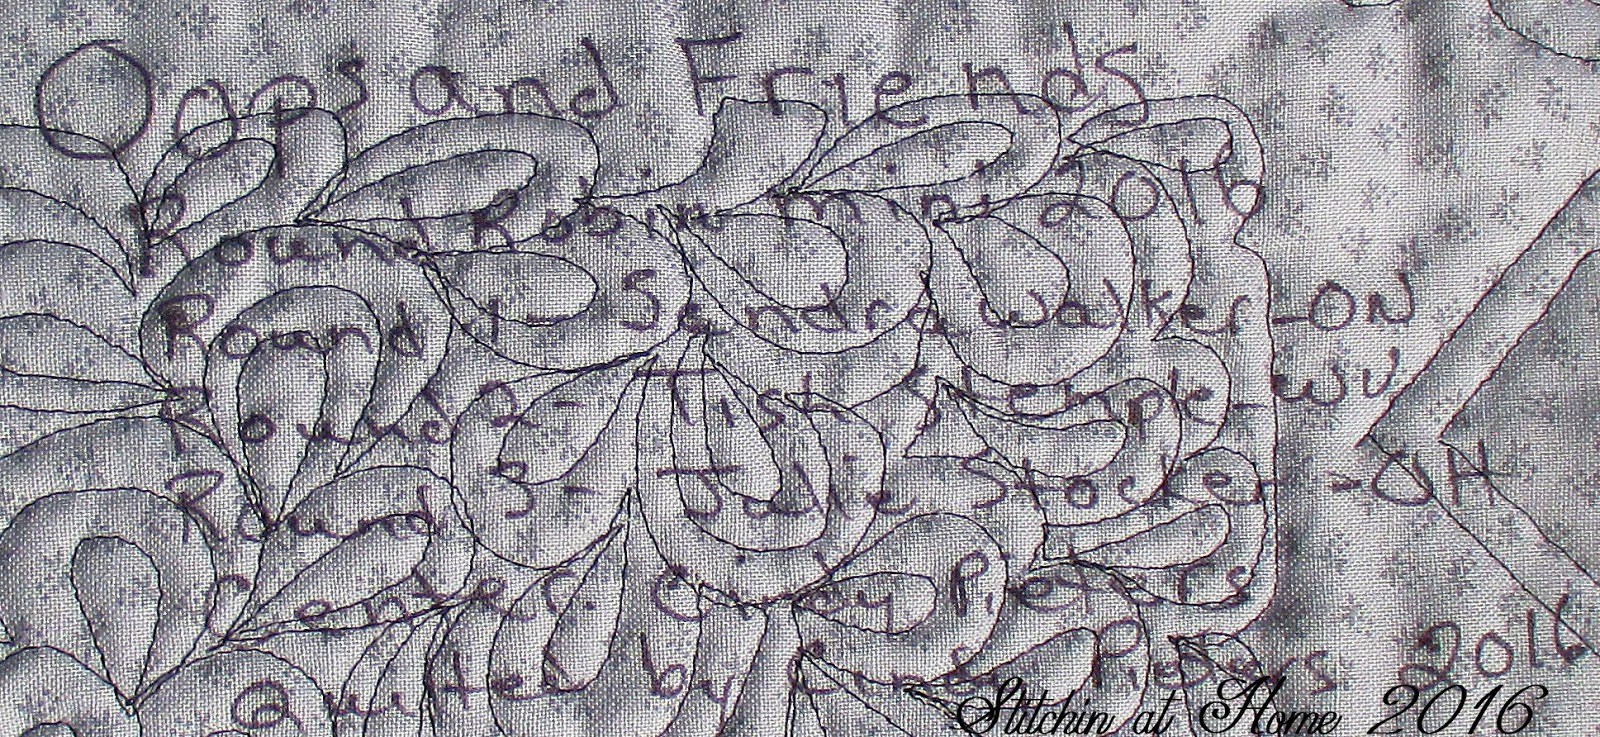

The label


Every quilt needs a label, whether it is written right on the back or attached. 

one more look at 'Oops and Friends'


This piece holds a very special place in my heart, it helped four friends become one. 
Thank you Sandra, Tish and Julie for helping 'Oops' grow up and for being the best of friends!!!


Wednesday, 31 August 2016

Mini Round Robin Reveal # 3

The final round is to Sandra of mmm!quilts block. You can read about the Round Robin here and here and here.

With Julie and Tish's additions

The more I looked at the block I knew I wanted to play with the square in a square that Sandra had started with, but how to. That was what I was having trouble with. I drew up a design in my graphics program and just played. Once I started the design just seemed to come together. The square in a square was done in blue pulling the blue from what Sandra had started with. The star points were a play on Tish's friendship stars that she had added and the purple points in the corners pulled out the purple that Julie added.

design drawn in my graphics program
Now I was ready for a fabric pull. I didn't have any background fabric in my stash that I liked so I was forced to go to my LQS, well okay maybe not forced. I found the perfect background fabric and I may or may not have gotten a few other things while there.

fabric pull

The background fabric is Rustic Weave by Moda, the purple is a Northcott, the blue is a batik and the green no idea it was a fat quarter with no selvedge.
Next step how in the world was I going to make the border, I knew the measurements as I can set a grid in my graphics program. Okay measurements are all well and good the green was easy a 4'' x 4'' cut on the diagonal. It was the blue that was a problem, it wasn't quite a triangle. Lightbulb moment here, I could make a template. The background was another easy one 6 1/2'' square cut on both diagonals. Time to start constructing.

background pieces added to the blue sorta triangle shape with the green added next


The purple points up next I knew how I was going to handle them, yup another template. The sides were a stitch and flip to the corner of a background piece.

stitch and flip corner and points


Oh yes I liked what I was seeing. I only needed my stitch ripper a few times but it wouldn't be sewing without using it. 

borders complete


An outdoor shot shows the colours better.

natural light shows the colours better

One of Sandra's favourite photo shoots is in a tree, I like tree shots too. The sun and with the piece being a mini getting that shot was hard.

tree shot

I hope Sandra likes what I added. 

I have enjoyed being a part of this round robin. It has pushed my creativity and challenged me. From time to time as quilters we need to step out of our comfort zones. Would I do it again? Yes!! I believe all four of us did an outstanding job on each round we added. We learnt more about each other and we all took into consideration the likes and dislikes of each other. 

I will add the direct links to the posts with the rest of the reveals as they become live.

Sandra of mmm!quilts
Julie of Pink Doxies


Monday, 1 August 2016

Mini Round Robin July

This months block was Tish's. You can read about Tish's initial block on her blog Tish's Adventures in Wonderland and Julie's addition to it on Julie's blog Pink Doxies.

After receiving it from Julie I kept thinking, what in the world was I going to add to it? I let it sit on my design wall, I felt at times like it was saying come on I'm tired of waiting. I pulled a few fabrics that I thought would work. That white with black squares is a Northcott. As happens, more often than I care to think about right now, I had a light bulb moment in the wee hours of the night. I'm pretty sure I'm not the only one who gets sleep( well it's supposed to be) time ideas.

I set to work trying to get my idea to work. The first try was not good. I needed the block to be 3 1/2'' square hmmm. No not square.
definitely not square 

Back to the drawing board. I knew a paper pieced pattern would give me an accurate size. Now if I knew how to work with EQ7 better I could have drawn the pattern up there but after spending half an hour and not getting the correct size I needed, I really need to play around and learn the program better. Eventually I will! But for now I went to my graphics program and a few minutes later I was in business.

paper piecing supplies
I gathered all my paper piecing supplies and I was ready to go. I printed my pattern piece on freezer paper as I do not enjoy peeling paper off the back after doing the sewing. Even with a shorter stitch it's still a pain. I tweaked one of the lines as you can see in the photo above it was a bit too narrow originally.
How about a little tutorial as to how I do paper piecing using freezer paper?

marked for placement

First print pattern on freezer paper, on the paper side in other words not the shiny side. Fold the paper along all the sewing lines.

folded along all lines

Place the fabric A1 piece wrong side up and iron the shiny side of the freezer paper to it.

press shiny side of paper to wrong side of fabric

I use the 'Add-A-Quarter' inch ruler to trim the first piece before adding piece A2.

trim A1 to a 1/4''

Place piece A2 right sides together matching the trimmed edge. With the freezer paper folded on the sewing line between piece one and two, sew the two pieces together right next to the folded edge of the paper but not through the paper. You will have a 1/4'' seam allowance.

sew next to the folded edge of the freezer paper.
Press the seam toward the second piece, but be careful not to touch the iron to the shiny side of the freezer paper or you will create a mess. Press from the back adhering the freezer paper to piece A2.

adding the pieces

Repeat the above steps with each of the remaining fabric pieces until your unit is finished.
Trim after you have the unit done make sure to leave the 1/4'' seam allowance all the way around. Pull the freezer paper off and you are ready to use it again. Do the same for the B side.

A and B completed


Sew A to B using a 1/4'' seam allowance.

one complete block
I made 12 blocks for the border around Tish's block.

layout of blocks around the center


The empty space between the blocks was 5 1/2''.  Four blocks would have fit with a 2'' spacer unit. Using the rule of  three always gives a more pleasing look, so three per side it was with a 5 1/2'' spacer.

a little silver sparkle in the spacer units

Now how about a picture of the block with my border added to it.

border addition

I like the border I added, I think I even impressed myself with this one. Okay Sandra your turn to add to this one.

If you would like to have a copy of the paper piece pattern that I used for Tish's block you can get it free at my Craftsy store. This is no longer available since Craftsy deleted all but two of my patterns.


I will be adding the direct links to the posts with the rest of the July round robin reveals, as they become live.

Julie of Pink Doxies
Tish of Tish's Adventures in Wonderland
Sandra of mmm!Quilts

Linking up to Main Crush Monday

I am an affiliate for Craftsy, and as such may receive a small commission if you click on one of the links in the post above and make a purchase.  It does not cost you any more.


Monday, 27 June 2016

Mini Round Robin June Reveal

It is reveal day for the Mini Round Robin!!!! All four of us have finished adding the first round to the centre blocks that were mailed to us. We had till the end of June to add our touch to them and we all had them done early. You can read about the centre blocks and rules here.  Julie sent me her block. My block went to Sandra. Sandra's to Tish and Tish's went to Julie. Go take a look at their blocks, I'll wait for you to get back.

Julie's block
This is Julie's block and my starting point. I wasn't sure what I was going to add. Time to audition some potential ideas. I have a container that I keep bits and pieces of things in. The container has things like HST's in various sizes, four patch, HRT's, strip set pieces, flying geese and etc. You get the idea. Right?

audition take #1
First up strip sets and HST's. Nope! Not doing a thing for me. Back to the container and pull out some more stuff potential good ideas.

audition take #2

I saw a winner in take #2. Did you see one you liked? Now how to take that idea that was floating around in my mind and add it to Julie's block.

more auditioning

You saw that half rectangle triangle in the lower part of take #2, that was going to be my starting point.  I knew I wanted to frame Julie's block but didn't want to do a traditional square in a square look .I made three more HRT's , they were 3 1/2'' by 6 1/2'', trying to pull the colours from the centre block and keep things cohesive. Next up was adding the 3 1/2 '' squares that were needed to make this work. Out came my container of scrap squares. Another winner is found. I sewed a 3 1/2'' square to each HRT.

y seam starting point

To make this work I was going to have to make a dreaded y-seam. I placed a dot a 1/4'' from the corner. The red arrow is pointing to the starting dot. The stitching starts exactly at the dot leaving the 1/4'' from the corner unsewn. The other three sides can then be sewn on in the typical manor of edge to edge until you reach the starting point.

coming to the final seam
When you reach the final side keep the first seam folded back so you don't catch it in your seam, sew off the end. Flip the first piece over and sew from the dot to the edge. A successful y-seam.

finish sewing the first side from the dot to corner

Hopefully the pictures helped explain how to do a y-seam better than my muddled wording.

Now for the reveal. I bet you want to see how my idea looks? 

the big reveal
I like it and I hope Julie does too. This was fun and a little scary at the same time. But I'm glad we are doing the round robin. I can't wait to see what addition Sandra made to 'Oops'.

I will be adding the direct links to the posts with the rest of the round robin reveals, as they become live. 

Julie of Pink Doxies
Sandra of mmm!Quilts


Linking up to Main Crush Monday