Wednesday 31 August 2016

Mini Round Robin Reveal # 3

The final round is to Sandra of mmm!quilts block. You can read about the Round Robin here and here and here.

With Julie and Tish's additions

The more I looked at the block I knew I wanted to play with the square in a square that Sandra had started with, but how to. That was what I was having trouble with. I drew up a design in my graphics program and just played. Once I started the design just seemed to come together. The square in a square was done in blue pulling the blue from what Sandra had started with. The star points were a play on Tish's friendship stars that she had added and the purple points in the corners pulled out the purple that Julie added.

design drawn in my graphics program
Now I was ready for a fabric pull. I didn't have any background fabric in my stash that I liked so I was forced to go to my LQS, well okay maybe not forced. I found the perfect background fabric and I may or may not have gotten a few other things while there.

fabric pull

The background fabric is Rustic Weave by Moda, the purple is a Northcott, the blue is a batik and the green no idea it was a fat quarter with no selvedge.
Next step how in the world was I going to make the border, I knew the measurements as I can set a grid in my graphics program. Okay measurements are all well and good the green was easy a 4'' x 4'' cut on the diagonal. It was the blue that was a problem, it wasn't quite a triangle. Lightbulb moment here, I could make a template. The background was another easy one 6 1/2'' square cut on both diagonals. Time to start constructing.

background pieces added to the blue sorta triangle shape with the green added next


The purple points up next I knew how I was going to handle them, yup another template. The sides were a stitch and flip to the corner of a background piece.

stitch and flip corner and points


Oh yes I liked what I was seeing. I only needed my stitch ripper a few times but it wouldn't be sewing without using it. 

borders complete


An outdoor shot shows the colours better.

natural light shows the colours better

One of Sandra's favourite photo shoots is in a tree, I like tree shots too. The sun and with the piece being a mini getting that shot was hard.

tree shot

I hope Sandra likes what I added. 

I have enjoyed being a part of this round robin. It has pushed my creativity and challenged me. From time to time as quilters we need to step out of our comfort zones. Would I do it again? Yes!! I believe all four of us did an outstanding job on each round we added. We learnt more about each other and we all took into consideration the likes and dislikes of each other. 

I will add the direct links to the posts with the rest of the reveals as they become live.

Sandra of mmm!quilts
Julie of Pink Doxies


Tuesday 23 August 2016

One Lovely Blog Award

Thanks to Tish of Tish's Adventures in Wonderland for nominating me for the One Lovely Blog Award. When I first started blogging I had no idea that it would lead to making new friends all over blogland not just in my own little corner, but all over. Quilty bloggers are the best! Ask for help and no one hesitates to ask how, they just do.


Apparently there are some rules to follow.

- Thank the person that nominated you and give a link to their blog.
- List the rules
- Display the award on your post of The Award
- List 7 facts about yourself
- Nominate (up to) 15 bloggers for this award and comment on one of their posts to let them know you have nominated them

Seven facts about me hmmmm here goes.

1. I don't like to put a lot of personal information about myself out there, I am more of  a private person.

2. I am not a cat person, I don't dislike them just not crazy about them. We have had a cat. We had a stray that adopted us. My hubby found him in our barn, he had ear mites and was so skinny. We took him to the vet and ended up having to put drops in his ears, man did he hate that and I had enough scratches to prove it. We had him for quite a few years.

3. I do like dogs! Big dogs! With German Shepards being my dog of choice, since we now live in town we don't have a dog currently. I said currently as I miss not having a dog near by.

4. I have lived in three different provinces in Canada. Prince Edward Island, Quebec and Ontario.

5. When I started school in PEI I went to a one room school house. And I am not as old as you are thinking right about now...So stop it.

6. I am now a two time cancer survivor. It is not an easy fight and having done it twice was extremely hard. I don't have the coveted all clear yet, but with having it twice I know it can strike when we least expect it to.

7. I don't like to follow rules, but I think I did okay this time.


Nominees are

Lara of BuzzinBumble
Sandra of mmm!quilts
Karen of Tu-na Quilts
Anja of Anja Quilts


Saturday 20 August 2016

A Glimpse of a Pattern

Notes aplenty some legible and some have left me scratching my head. My process involves drawing up a pattern and the basic measurements. I then write the steps as I go trying to snap a photo of each step as I go.

notes and bits and pieces

It is always good when the pieces line up and fit the way I envisioned them. 

fitting correctly

perfection
Back to more writing and testing.  I also need to get working on my addition to Sandra's of mmm!quilts block done for the Mini Round Robin. You can read more about the Mini Round Robin here, here and here.

Craftsy is having a Black Friday Sale this weekend. Go take a look around you never know what you'll find. 

Craftsy Black Friday Sale


Sunday 7 August 2016

Mod Bear Paws Flimsy

Lorna of Sew Fresh Quilts recently asked for testers for her new Mod Bear Paws pattern. I made the baby size as I need either a pink or blue baby quilt in March. After some serious complications and loss a year ago from an ectopic pregnancy, my DIL is expecting. Fingers and toes crossed and lots of prayers that both mother and baby will be fine.

Bear paws require a fair amount of HST's good thing I'm not afraid of making them, as I got lots of practice making all those 1 1/2'' HST's.

baby size
 I was going to write this post after I had quilted it, but I'm not sure that's going to happen real soon. Another project has been taking all my time.

stained glass effect

Lorna's patterns are easy to follow with lots of great pictures. I'm not sure if you noticed but even with great instructions I still made a mistake I had one of the forehead pieces put in wrong. More practice with the seam ripper, not that I need any practice, and now my bear has his forehead all fixed as you can see in the next photo.

taking a stroll in the garden
Lorna is having a QAL for Mod Bear Paws in September. If you got the pattern now you could get a head start on your very own bear.

My flowers are not doing the best this year with all the hot and extremely dry weather we have been experiencing.

floribunda rose

Usually this rose bush is covered with blooms, not so this year. This is a floribunda rose, I prefer hybrid teas. They are all suffering even though I keep them watered.


phlox
Even the phlox isn't as showy. Some rain sure would be welcome.

How are your gardens doing this year?


Monday 1 August 2016

Mini Round Robin July

This months block was Tish's. You can read about Tish's initial block on her blog Tish's Adventures in Wonderland and Julie's addition to it on Julie's blog Pink Doxies.

After receiving it from Julie I kept thinking, what in the world was I going to add to it? I let it sit on my design wall, I felt at times like it was saying come on I'm tired of waiting. I pulled a few fabrics that I thought would work. That white with black squares is a Northcott. As happens, more often than I care to think about right now, I had a light bulb moment in the wee hours of the night. I'm pretty sure I'm not the only one who gets sleep( well it's supposed to be) time ideas.

I set to work trying to get my idea to work. The first try was not good. I needed the block to be 3 1/2'' square hmmm. No not square.
definitely not square 

Back to the drawing board. I knew a paper pieced pattern would give me an accurate size. Now if I knew how to work with EQ7 better I could have drawn the pattern up there but after spending half an hour and not getting the correct size I needed, I really need to play around and learn the program better. Eventually I will! But for now I went to my graphics program and a few minutes later I was in business.

paper piecing supplies
I gathered all my paper piecing supplies and I was ready to go. I printed my pattern piece on freezer paper as I do not enjoy peeling paper off the back after doing the sewing. Even with a shorter stitch it's still a pain. I tweaked one of the lines as you can see in the photo above it was a bit too narrow originally.
How about a little tutorial as to how I do paper piecing using freezer paper?

marked for placement

First print pattern on freezer paper, on the paper side in other words not the shiny side. Fold the paper along all the sewing lines.

folded along all lines

Place the fabric A1 piece wrong side up and iron the shiny side of the freezer paper to it.

press shiny side of paper to wrong side of fabric

I use the 'Add-A-Quarter' inch ruler to trim the first piece before adding piece A2.

trim A1 to a 1/4''

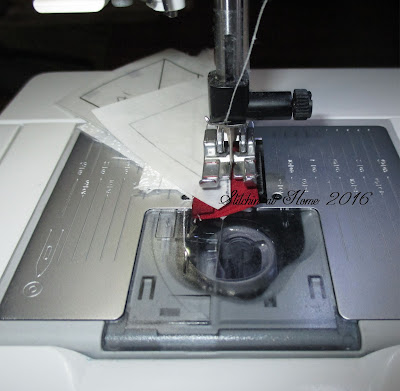
Place piece A2 right sides together matching the trimmed edge. With the freezer paper folded on the sewing line between piece one and two, sew the two pieces together right next to the folded edge of the paper but not through the paper. You will have a 1/4'' seam allowance.

sew next to the folded edge of the freezer paper.
Press the seam toward the second piece, but be careful not to touch the iron to the shiny side of the freezer paper or you will create a mess. Press from the back adhering the freezer paper to piece A2.

adding the pieces

Repeat the above steps with each of the remaining fabric pieces until your unit is finished.
Trim after you have the unit done make sure to leave the 1/4'' seam allowance all the way around. Pull the freezer paper off and you are ready to use it again. Do the same for the B side.

A and B completed


Sew A to B using a 1/4'' seam allowance.

one complete block
I made 12 blocks for the border around Tish's block.

layout of blocks around the center


The empty space between the blocks was 5 1/2''.  Four blocks would have fit with a 2'' spacer unit. Using the rule of  three always gives a more pleasing look, so three per side it was with a 5 1/2'' spacer.

a little silver sparkle in the spacer units

Now how about a picture of the block with my border added to it.

border addition

I like the border I added, I think I even impressed myself with this one. Okay Sandra your turn to add to this one.

If you would like to have a copy of the paper piece pattern that I used for Tish's block you can get it free at my Craftsy store. This is no longer available since Craftsy deleted all but two of my patterns.


I will be adding the direct links to the posts with the rest of the July round robin reveals, as they become live.

Julie of Pink Doxies
Tish of Tish's Adventures in Wonderland
Sandra of mmm!Quilts

Linking up to Main Crush Monday

I am an affiliate for Craftsy, and as such may receive a small commission if you click on one of the links in the post above and make a purchase.  It does not cost you any more.