Wednesday, 21 February 2018

Occupying my Sewing Time

What to do when ones sewing machine is again headed to the repair shop?? This machine and all it's problems is so frustrating. At this point I wish I had bought something else, heck anything else would have been better.
The needle bar needs replacing, it will not hold the needle in. This started in the fall it would drop every needle size except a 90/14. It took four months to get the part unreal!!!! grrrrrrr!!! Apparently it is a known problem, one my dealer wasn't aware of. The machine company says it is something that should be replaced when servicing...WHAT???????

To occupy my time I have been participating in Sandra of mmmquilts 30 Quilt Design Challenge.

Here are a few I have drawn up.


I have a few that I want to make now, if only? Time to get my vintage Singer out if I'm going to do any sewing. In the mean time more designing. Maybe writing up up a pattern or two or three?

What do you do when your sewing machine is requiring time in the repair shop?


Sunday, 18 February 2018

Medallion Quilt Last Blocks

I am posting the last two blocks that I used in the Medallion Quilt layout. When posting the blocks to my blog I may have made a small error and posted an additional block that I didn't use in the original quilt. The extra block was the Churn Dash Block. Sorry Tish I know you have been keeping up in between your other BOM's and QAL's.

First up is the Tile Block. A simple block made with squares and rectangles.

Tile Block

This is a 12 1/2'' unfinished or 12'' finished block.

All seams are 1/4''.

Cutting:
Dark fabric:   A   4- 2 1/2'' x 1 1/2''
Fat Quarters: B   4- 4 1/2'' x 4 1/2''
Background Fabric: C  4- 2 1/2'' x 2 1/2'' 
                                 D  4- 2 1/2'' x 4 1/2''
                                 E  1- 4 1/2'' x 4 1/2''

Step 1:

1. Stitch piece C to E.
2. Make 4.
3. Stitch piece D to the units you just completed. See diagram 1.
4. Make 4.

diagram 1

Step 2:

1. Stitch together in rows see diagram 2 below.

diagram 2


The last block is the Ribbons Block. It is made with squares and HST's.

Ribbons Block

This is a 12 1/2'' unfinished or 12'' finished block.

All seams are 1/4''

Cutting:
Dark fabric:   A  4-  4'' x 4''  
                      B   4- 3 1/2'' x 3 1/2''
Medium Fabric: C   2- 4'' x 4''
Background Fabric: D  4- 4'' x 4'' 
                              

Step 1:

1. On the back of all piece D's draw a diagonal line from corner to corner. As per diagram 1a.
2. Place the square on top of piece C. Sew a 1/4'' seam on both sides of the line. As per diagram 1b.
3. Cut on drawn line. As per diagram 1c.
4. Press HST's to dark side.
5. Trim the HST's to 3 1/2'' x 3 1/2''
6. Make 4.

diagram 1

Step 2

1. Repeat Step 1 using pieces A and D.
2. Make 4.

Step 3

1. Repeat Step 1 using pieces A and C, drawing the diagonal line on piece C.
2. Make 4.

Step 4

1. Sew units together to make rows.
2. Sew rows together to make block. See diagram 2.

diagram 2


Next month we'll put it altogether with the sashing and border instructions.


I would love to see any of the blocks you have made, you can post to Instagram using #stitchinathomemedallion2017 


Monday, 12 February 2018

Animal Quilt Finish

In October I started a quilt for my 4 year old grandson. His favourite colour is blue and he wanted animals. Now I ask you what grandma doesn't want to give a grandchild what they want. You can read more about the start here.

donkey from Lorna
The donkey is a pattern from Lorna of Sew Fresh quilts. All the patterns in the quilt are from Lorna, her Farm Friends Pattern and some of her free patterns.

I drew up a quick diagram in my graphics program to show how I joined the blocks 
After laying the animals out with the help of my DD, and let me tell you they did a lot of moving around. It was hard to keep them corralled. I proceeded to sew them in rows. For each row I measured the largest block and pieced the others to fit as per the example above.

How about pictures of some of the animals. Each animal got his/her own FMQing motif. The background I quilted with stars and loops.

the large dog

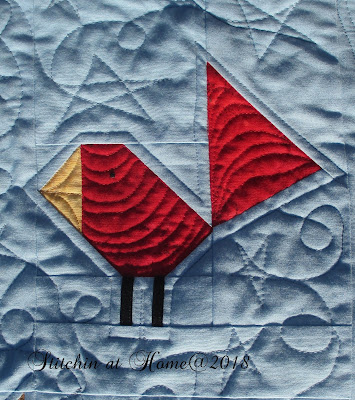
one of four birds

froggie


chick
I used a wide backing called Essentials from Wilmington Prints.

back of quilt, it is a pretty blue

My quilt holder upper isn't tall enough and the snow was a challenge. I will be glad when all this snow goes away. We have had wayyyyyyyyy too much this last week, approximately one foot ughhh.


snow challenge showing the complete quilt

This quilt is 83'' by 62'' after washing, a nice size for his bed.

Linking up to Main Crush Monday,  Let's be SocialLinky Tuesday, Midweek Makers, Confessions of a Fabric Addict


Try a 7 day free trial on Craftsy Unlimited! (an affiliate link)With Craftsy Unlimited you'll have every Craftsy class, plus new and exclusive video tutorials at your fingertips! Why join Craftsy Unlimited?

    New and exclusive content released weekly
    600+ of the world's top creative experts
    Join a community of 13 million other makers
    Access from any device, anywhere, anytime
    1,300 expert taught classes

Dive into thousands of hours of expert taught videos and bring your best ideas to life. Whether you love stitches, swatches, pasta or paint, you'll never be without a source of inspiration. Give Craftsy Unlimited a try for free.


Friday, 2 February 2018

An Oldie Throwback Thursday

For throwback Thursday which is being hosted by Sandra of mmmquilts, I pulled an oldie. I made this either in 1999 or 2000, no label as at that time I had no idea how important a label was and the information that could be garnered from one.

first paper piecing project

This was my first foray into paper piecing. I remember that Carol Doak was the queen of paper piecing at the time. I was surprised that I still had the book that this one came from. There were a lot of firsts in this one including machine quilting.

wrinkles aplenty just out of the cupboard
I liked matchy points even then and paper piecing does a good job of accomplishing them. Fast forward to today I strive for those matchy matchy points and am successful about 90% of the time.

first time fmqing

I shudder now when I see how bad my first FMQing was. We all have to learn somewhere and sometime so this is also a gentle reminder as to how far I've come in my fmqing skills. All it takes is a little practice.

those poor swirls!


a crisp morning snow picture

As with any firsts this little 40'' x 40'' will always hold a place in my heart. I really should have tossed it in the dryer to relax those wrinkles.

Thursday, 1 February 2018

2018 New Quilt Bloggers Registration

Registration for the 2018 New Quilt Bloggers Blog Hop begins today. If you have been blogging less than 3 years and are interested, visit any of the 2018 co-hosts for all the details you need to sign up: Beth from Cooking Up QuiltsSandra from mmm! Quilts, Jen from Dizzy Quilter, and Tish from Tish n’ Wonderland